Introduction
APIs allow you to share your service with the world. But you don’t always want the whole world to be able to access your service. That’s when you start to look into solutions to prevent that from happening, by adding authentication for example.
In this article I’ll guide you through the steps to add authentication to your API on Azure App Service.
The steps in this article are also applicable for APIs written in other programming languages- it doesn’t matter if it’s an R Plumber API or not.
Authentication vs. Authorization
Authentication and Authorization are often used interchangeably, but they represent fundamentally different functions. In simple terms, authentication verifies who a user is, while authorization verifies what the user has access to. Authorization usually follows after authentication.
Taking a look at an API we can distinguish the two functions like this: you need to provide a key or a password when you want to make request. With this key or password you authenticate yourself. After that, the API can check if you didn’t exceed your request quota for example. If you have enough requests left, you are being authorized to make the request.
In this tutorial we’re focussing on authentication: we want to verify who a user is before they can make a request to the API.
Authentication options
There are multiple ways to add authentication to our API on Azure App Service:
- Using Azure’s built-in authentication (also referred to as Easy Auth). This includes the preview option to add any OpenID Connect provider.
- Using Azure API Management to add subscription keys.
- Adding IP access restrictions (not recommended).
- Managing authentication in the API yourself (also not recommended).
Authentication is challenging to set up and maintain. That’s why cloud service providers like Azure have built-in options to do it for you. While you could built your own user databases and write code to add authentication to your API yourself, it is most often more cost-effective and secure to use existing options. You’re a developer, not a security expert.
Simple solutions like setting up IP access restrictions work in some cases (e.g. if you have a dedicated server with a fixed IP that’s the only machine that’s ever going to make requests to your API), but in most cases this solution is not suitable as the IP of the requester is either unknown upfront, or changes too often.
That leaves two good options: Easy Auth or API Management. Both are valid options, and what you choose depends on your use case. In this article we’ll explore both options.
Adding Azure’s Easy Auth
Easy Auth acts as a gateway in front of your Azure App Service API. It provides a zero-code solution for authentication. It’s easy to set up and simple to maintain. There’s no code involved, and you can manage everything through the Azure portal.
Let’s go to our plumberdemo App Service that we created earlier. Head over to ‘Authentication’:

We opt Microsoft as identity provider and leave the default settings mostly as is. The only thing we change is what we do with ‘Unauthenticated requests’- we change that to a HTTP 401 response:

Changing it to 401 means that if we would make a request in Postman, we would get this response:

Navigating to the URL in your browser won’t do anything. It will just show you a white screen. If we would have chosen the HTTP 302 Found Redirect option you would be navigated to a login screen instead:
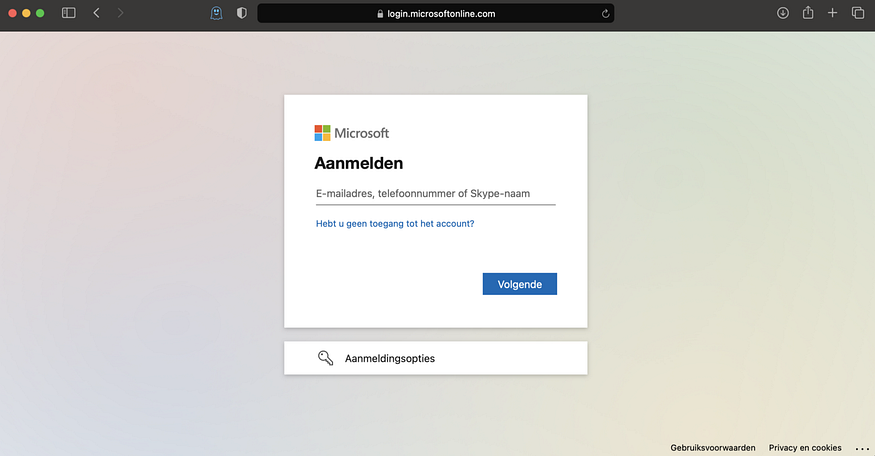
Since an API is most often called from another application, and not a browser, it’s not really relevant to have a nice looking login screen. Returning a 401 on unauthorized requests is enough. But, if a nice looking login screen is what you’re looking for, you can go with the 302 option and even add your own branding to it- a nice touch!
So, our API now requires authentication! That’s great, but how do authenticate ourselves?
There are two kinds of authentication: user authentication and service authentication. With user authentication the requesting entity is a user represented as Active Directory user. With service authentication the requesting entity is a service represented as a specific Azure resource (another App Service for example).
Let’s explore both options in the following sections. You can follow either the user authentication or service authentication part. Both sections are independent from each other.
1️⃣ User authentication: Azure Active Directory
If you want to authenticate users, you can do that with Azure Active Directory (Azure AD). This kind of authentication is more common for front-end applications, but you can also use it in back-end solutions.
Azure AD is a cloud-based identity and access management (IAM) solution. It helps members of an organization to log in to resources in the Azure Portal, apps on a corporate network or intranet, and services like Microsoft 365.
When we set-up Microsoft as identity provider, an enterprise application was created for us. Here we can manage user access. By default, all users in our organization have access to our API. But we can think of scenarios where we only want to allow certain teams or individuals to have access to the API. So let’s start by allowing only a single user to the API.
Find your enterprise applications by searching for it in the Portal:

Your application has the same name as the App Service you set up. In our case that is ‘plumberdemo’:

Click on it, and go to ‘Properties’. You need to set make assignment required:

If you’ve done that, you can go to ‘Users and groups’ to add your desired users.

And no, I did not change name. In my case we’re adding my business partner Greg to our API 😉.
Once you’ve set this up other users in Azure AD won’t have access to your API anymore. Now let’s see how this works out in Postman!
First, we need to create a Client Secret. A Client Secret is a secret string that the API uses to prove its identity when requesting a token. It’s also referred to as the application password. We set a Client Secret in our App registrations. You can easily find your the registration for your API there:

Click on it, and navigate to the ‘Certificates & secrets’ section. You can create a new client secret there. Just give it a name (‘ClientSecretDemo’ in my case) and choose an expiry date for you secret. It defaults to 6 months.

Save the value for later. We’re going to use that for our request in Postman.
The second thing we need to do is change something in our Manifest. Instead of setting accessTokenAcceptedVersion to null (which means 1 by default), we are going to set it to 2:

Azure is ready, now it’s time for Postman. In Postman we go to ‘Authorization’ and we choose ‘OAuth 2.0’ from the list of possibilities:

We’re going to configure a new token:

As you can see we need a lot of information. To fill everything in we need a Resource ID, Client ID, and Directory ID. You can find all of them on the App registration Overview page:

From the page itself it’s quite self-evident where we need to put the Client ID, but for the other two (Resource ID and Diterctory ID) it’s a bit more work.
The Auth URL and Access Token URL both use the Resource ID and Directory ID, like so:
- The Auth URL is https://login.microsoftonline.com/directoryid/oauth2/authorize?resource=resourceid
- The Access Token URL is https://login.microsoftonline.com/directoryid/oauth2/token?resource=resourceid
If we fill everything in it looks like this:

After filling in all the required information we can get the new access token. We get asked to sign in and we need to sign in with the account that we granted access earlier.

If all goes well, we get our Access Token of type Bearer returned in Postman:
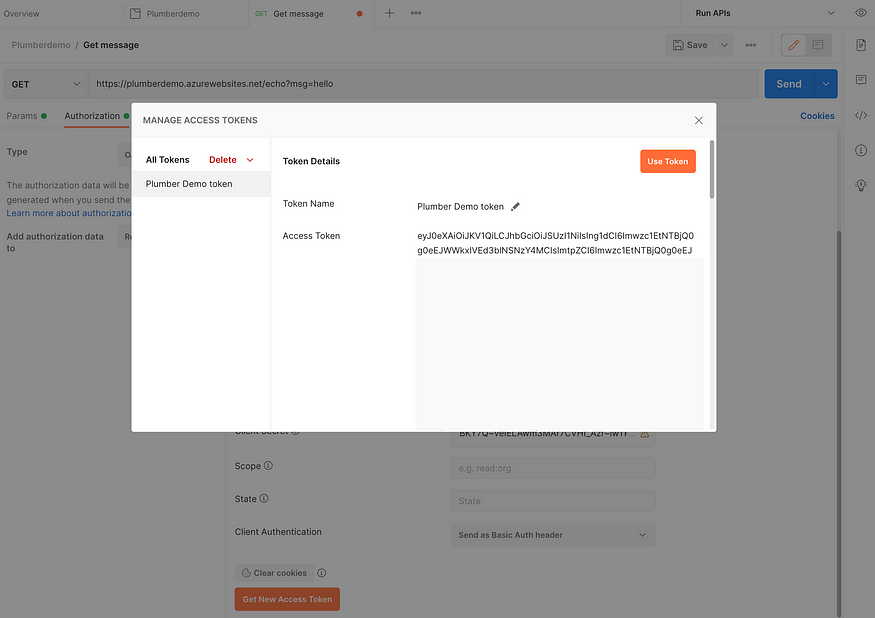
Click ‘Use Token’. If we’re trying to make a request now, we don’t get 401 anymore, but 200!

2️⃣ Service authentication: API Management
There’s also another option. Instead of user based authentication we can add service based authentication. We’re not authenticating an user, but we’re authenticating another application.
To follow along with this part of the tutorial, remove the Azure identity configuration in your App Service if you did that in the previous section!
API keys are simple to add using Azure API Management. Let’s first create an API Management resource:
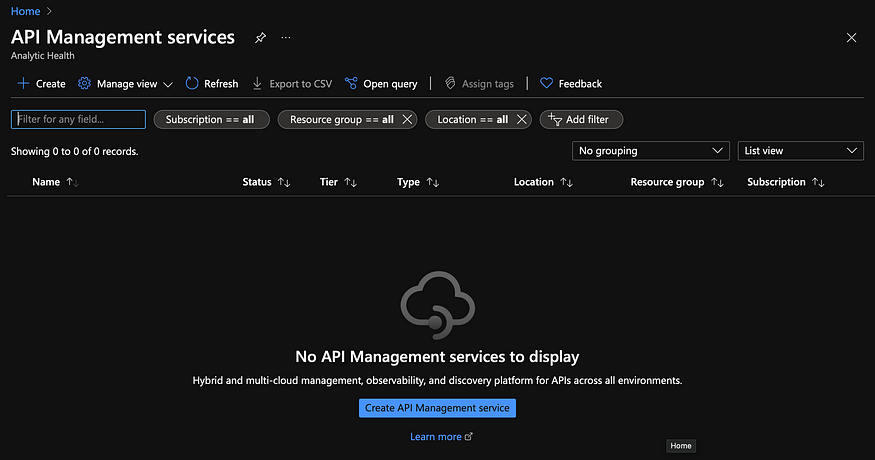

Create the resource and after deployment you can go ahead with the next steps. Deployment can take a while.
When you create an API Management resource, you are creating a “shell” that needs to be filled with your APIs. Those APIs can come from anywhere, Azure App Service included.
Let’s create an API for our ‘plumberdemo’ by importing our API from App Service:


If you look into the settings of your newly added API you’ll see a ‘General’ and a ‘Subscription’ section. It’s important that ‘Subscription required’ is turned on and that you set an API URL suffix, like this:
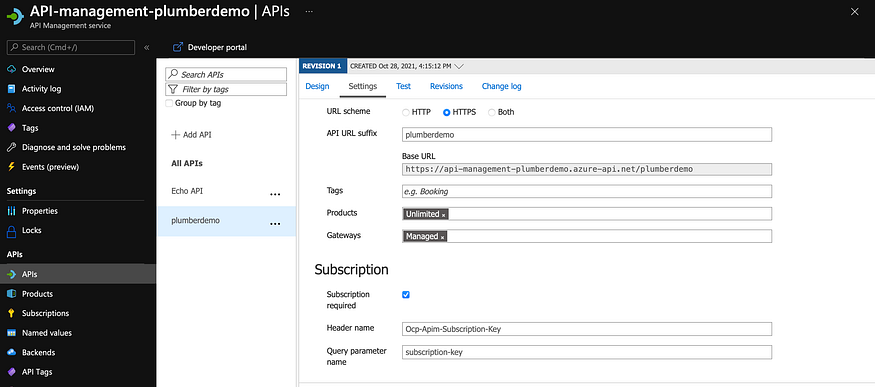
The next step is to adjust the backend URL (in the ‘Design’ panel) and override the URL. You need to set it to your original App Service URL:


Now go to ‘Subscriptions’ on the left and add a new subscription. You can also use one of the automatically added subscriptions. But for the sake of the tutorial we create a new one:

After creating it you can show the keys by clicking ‘…’:

You can use the primary key when we’re trying to make a request. But let’s first see what happens if we don’t use our key. If we want to make a request with Postman without specifying a key, we get a nicely formatted message saying we’re not allowed to do so:

But if we supply our key in the header (the name of which you can choose at the settings in your API):

We get our desired response!
One questions remains: how do we make sure that people don’t make a request directly to the URL of the App Service itself (plumberdemo.azurewebsites.net)? After all, it’s not there that we concern ourselves with authentication if we take this route. Luckily our API Management service has an IP. And while I mentioned here that it was not the recommended way to do things, we can do so in this particular case because the IP is fixed and it’s the only service making use of the API.
We can simply go to our App Service and add ‘Access Restrictions’, so we allow only the IP our API Management service:

This will get us a 401 when going to the URL of the App Service directly…
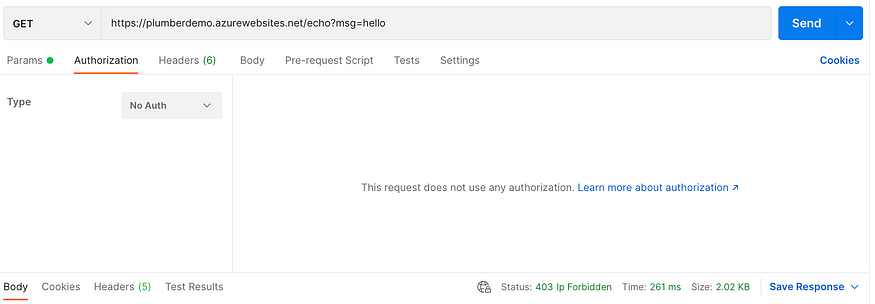
But it will still allow us to make calls to our API Management service with our subscription key:

Summary
In this article I explained the difference between authentication and authorization and I showed you different options for adding authentication to your Azure App Service. We can add user based and service based authentication. The first uses Azure Active Directory and the second uses Azure API Management.
By following the first part on how to host an R Plumber API on Azure App Service and this part on how to add authentication to your API, you master the basics to build your own API and use it in other applications to share your work with (part of) the world 🚀.
Happy programming!
Resources
- Azure API Management: https://azure.microsoft.com/nl-nl/services/api-management/
- Azure App Service: https://azure.microsoft.com/nl-nl/services/app-service/
- Azure Active Directory: https://azure.microsoft.com/nl-nl/services/active-directory/
- Postman: https://www.postman.com
- Authentication and authorization in Azure App Service and Azure Functions: https://docs.microsoft.com/en-us/azure/app-service/overview-authentication-authorization
- Import an Azure Web App as API: https://docs.microsoft.com/en-us/azure/api-management/import-app-service-as-api

No comments:
Post a Comment