Summary: very good article to learn
1. implenting microservices
2. using rabbitmq to send messages to service
Use RabbitMQ, C#, REST-API and Entity Framework for asynchronous decoupled communication and eventually consistency with integration events and publish-subscribe
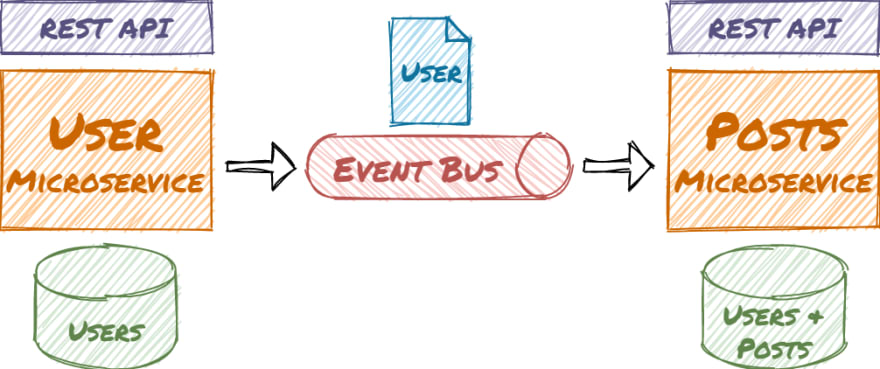
In this guide, you will create two C# ASP.NET Core Microservices. Both microservices have their own bounded context and domain model. Each microservice has its own database and REST API. One microservice publishes integration events, that the other microservice consumes.
Decoupled Microservices — A Real-World Example With Code
The application uses a real-world example with users that can write posts. The user microservice allows creating and editing users. In the user domain, the user entity has several properties like name, mail, etc. In the post domain, there is also a user so the post microservice can load posts and display the writers without accessing the user microservice. The user entity in the post domain is much simpler:
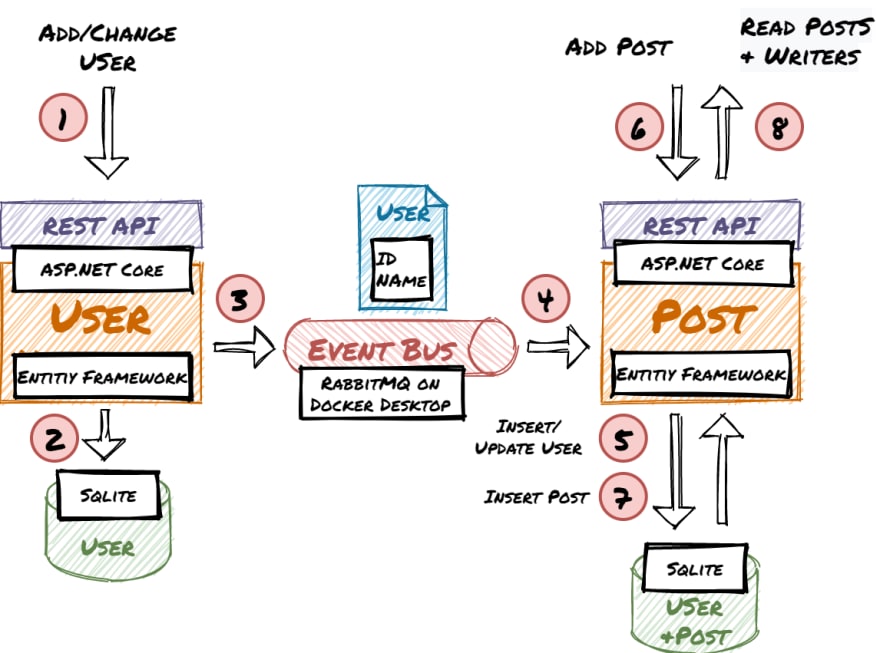
The microservices are decoupled and the asynchronous communication leads to eventual consistency. This kind of architecture is the basis for loosely coupled services and supports high scalability. The microservices access their example Sqlite databases via Entity Framework and exchange messages via RabbitMQ (e.g. on Docker Desktop).
Overview diagram of the workflow, components, and technologies:
The code and configurations in this article are not suitable for production use. This guide focuses on the concepts and how the components interact. For this purpose error handling, etc. is omitted.
Steps of this Guide
Create the .NET Core Microservices
Use RabbitMQ and Configure Exchanges and Pipelines
Publish and Consume Integration Events in the Microservices
Test the Workflow
Final Thoughts and Outlook
1. Create the .NET Core Microservices
In the first part of this guide, you will create the User and Post Microservice. You will add the Entities and basic Web APIs. The entities will be stored and retrieved via Entity Framework from Sqlite DBs. Optionally you can test the User Microservice with the Swagger UI in the browser.
Let’s get started.
Install Visual Studio Community (it’s free) with the ASP.NET and web development workload.
Create a solution and add the two ASP.NET Core 5 Web API projects “UserService” and “PostService”. Disable HTTPS and activate OpenAPI Support.
For both projects install the following NuGet packages:
Microsoft.EntityFrameworkCore.Tools
Microsoft.EntityFrameworkCore.Sqlite
RabbitMQ.Client
Implement the UserService
Create the User Entity:
Create the UserServiceContext:
Edit Startup.cs to configure the UserServiceContext to use Sqlite and call Database.EnsureCreated() to make sure the database contains the entity schema:
Create the UserController (It implements only the methods necessary for this demo):
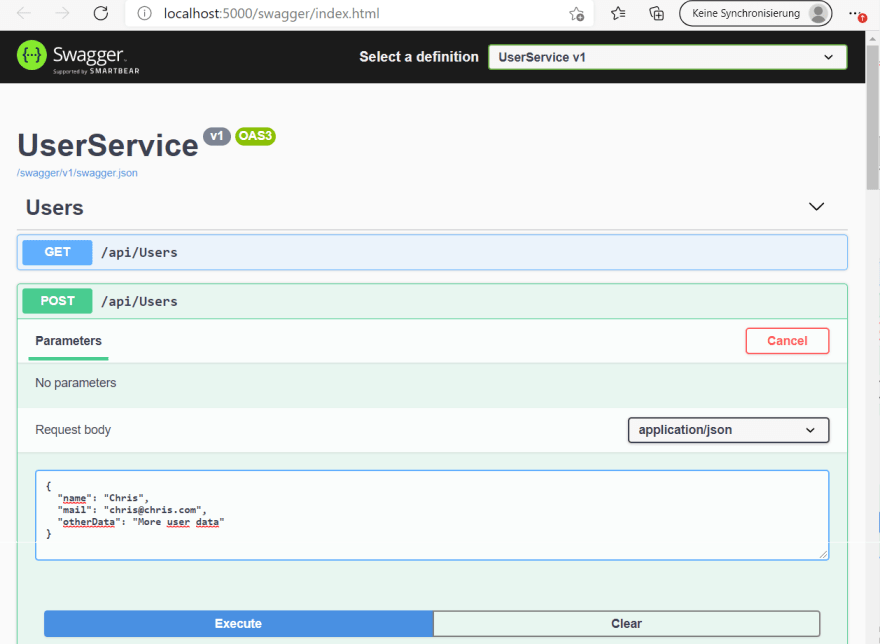
Debug the UserService project and it will start your browser. You can use the swagger UI to test if creating and reading users is working:
Implement the PostService
Create the User and Post entities:
Create the PostServiceContext:
Edit startup.cs to configure the UserServiceContext to use Sqlite and call Database.EnsureCreated() to make sure the database contains the entity schema:
Create the PostController:
Currently, you can’t insert posts, because there are no users in the PostService database.
2. Use RabbitMQ and Configure Exchanges and Pipelines
In the second part of this guide, you will get RabbitMQ running. Then you will use the RabbitMQ admin web UI to configure the exchanges and pipelines for the application. Optionally you can use the admin UI to send messages to RabbitMQ.
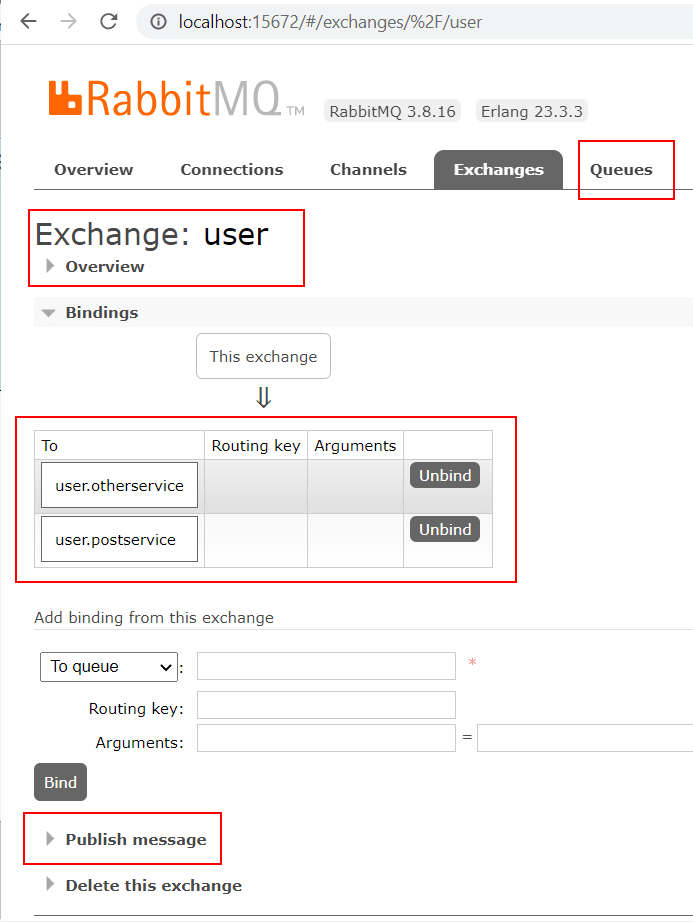
This graphic shows how the UserService publishes messages to RabbitMQ and the PostService and a potential other service consume those messages:
The easiest way to get RabbitMQ running is to install Docker Desktop. Then issue the following command (in one line in a console window) to start a RabbitMQ container with admin UI :
C:\dev>docker run -d -p 15672:15672 -p 5672:5672 --hostname my-rabbit --name some-rabbit rabbitmq:3-management
Open your browser on port 15672 and log in with the username “guest” and the password “guest”. Use the web UI to create an Exchange with the name “user” of type “Fanout” and two queues “user.postservice” and “user.otherservice”.
It is important to use the type “Fanout” so that the exchange copies the message to all connected queues.
You can also use the web UI to publish messages to the exchange and see how they get queued:
3. Publish and Consume Integration Events in the Microservices
In this part of the guide, you will bring the .NET microservices and RabbitMQ together. The UserService publishes events. The PostService consumes the events and adds/updates the users in its database.
Modify UserService.UserController to publish the integration events for user creation and update to RabbitMQ:
The connection and other RabbitMQ objects are not correctly closed in these examples. They should also be reused. See the official RabbitMQ .NET tutorial
Modify (and misuse) PostService.Program to subscribe to the integration events and apply the changes to the PostService database:
4. Test the Workflow
In the final part of this guide you will test the whole workflow:
Summary of the steps in the last part of this guide (you can access the services with the Swagger UI):
Call the UserService REST API and add a user to the user DB
The UserService will create an event that the PostService consumes and adds the user to the post DB
Access the PostService REST API and add a post for the user.
Call the PostService REST API and load the post and user from the post DB
Call the UserService REST API and rename the user
The UserService will create an event that the PostService consumes and updates the user’s name in the post DB
Call the PostService REST API and load the post and renamed user from the post DB
The user DB must be empty. You can delete the user.db (in the Visual Studio explorer) if you created users in previous steps of this guide. The calls to Database.EnsureCreated() will recreate the DBs on startup.
Configure both projects to run as service:
Change the App-URL of the PostService to another port (e.g. http://localhost:5001) so that both projects can be run in parallel. Configure the solution to start both projects and start debugging:
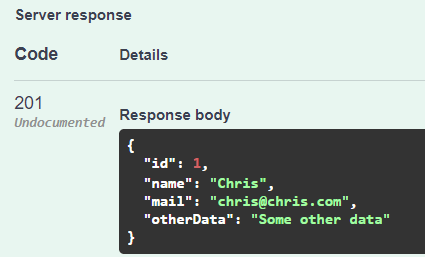
Use the Swagger UI to create a user in the UserService:
{
 "name": "Chris",
 "mail": "chris@chris.com",
 "otherData": "Some other data"
}
The generated userId might be different in your environment:
The integration event replicates the user to the PostService:
Now you can create a post in the PostServive Swagger UI (use your userId):
{
  "title": "MyFirst Post",
  "content": "Some interesting text",
  "userId": 1
}
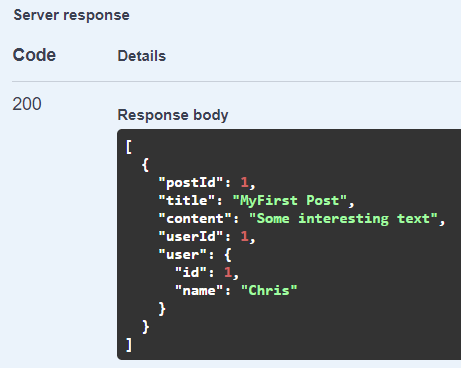
Read all posts. The username is included in the result:
Change the username in the UserService Swagger UI:
{
  "id": 1,
  "name": "My new name"
}
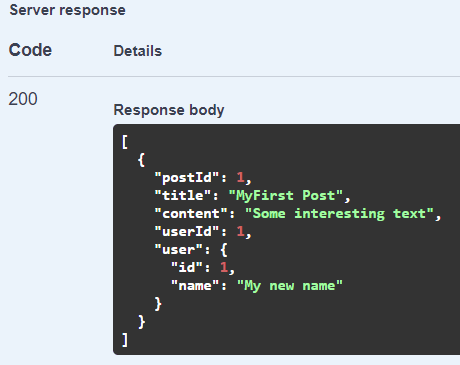
Then read the posts again and see the changed username:
5. Final Thoughts and Outlook
You created the working basis for an event-driven microservice architecture. Besides data replication, you can also use it for classic producer-consumer workflows, SAGAs, etc.
Please make sure to adjust the code to use it in a production environment: Clean up the code and apply security best practices. Apply .NET Core design patterns, error handling, etc.
Currently messages could be lost in edge cases when RabbitMQ or the microservices crash. See my follow-up article on how to apply the transactional outbox pattern and make the application more resilient.
See my other articles on how to:
- Use Database Sharding and Scale your application
- Deploy your ASP.NET Core application to Kubernetes, use Angular for the UI
- Add MySql and MongoDB databases.
Please contact me if you have any questions, ideas, or suggestions.






No comments:
Post a Comment