Monday, July 31, 2023

Adding Authentication to an API on Azure App Service


Introduction

APIs allow you to share your service with the world. But you don’t always want the whole world to be able to access your service. That’s when you start to look into solutions to prevent that from happening, by adding authentication for example.

In this article I’ll guide you through the steps to add authentication to your API on Azure App Service. 

The steps in this article are also applicable for APIs written in other programming languages- it doesn’t matter if it’s an R Plumber API or not.

Authentication vs. Authorization

Authentication and Authorization are often used interchangeably, but they represent fundamentally different functions. In simple terms, authentication verifies who a user is, while authorization verifies what the user has access to. Authorization usually follows after authentication.

Taking a look at an API we can distinguish the two functions like this: you need to provide a key or a password when you want to make request. With this key or password you authenticate yourself. After that, the API can check if you didn’t exceed your request quota for example. If you have enough requests left, you are being authorized to make the request.

In this tutorial we’re focussing on authentication: we want to verify who a user is before they can make a request to the API.

Authentication options

There are multiple ways to add authentication to our API on Azure App Service:

Authentication is challenging to set up and maintain. That’s why cloud service providers like Azure have built-in options to do it for you. While you could built your own user databases and write code to add authentication to your API yourself, it is most often more cost-effective and secure to use existing options. You’re a developer, not a security expert.

Simple solutions like setting up IP access restrictions work in some cases (e.g. if you have a dedicated server with a fixed IP that’s the only machine that’s ever going to make requests to your API), but in most cases this solution is not suitable as the IP of the requester is either unknown upfront, or changes too often.

That leaves two good options: Easy Auth or API Management. Both are valid options, and what you choose depends on your use case. In this article we’ll explore both options.

Adding Azure’s Easy Auth

Easy Auth acts as a gateway in front of your Azure App Service API. It provides a zero-code solution for authentication. It’s easy to set up and simple to maintain. There’s no code involved, and you can manage everything through the Azure portal.

Let’s go to our plumberdemo App Service that we created earlier. Head over to ‘Authentication’:

We opt Microsoft as identity provider and leave the default settings mostly as is. The only thing we change is what we do with ‘Unauthenticated requests’- we change that to a HTTP 401 response:

Changing it to 401 means that if we would make a request in Postman, we would get this response:

Navigating to the URL in your browser won’t do anything. It will just show you a white screen. If we would have chosen the HTTP 302 Found Redirect option you would be navigated to a login screen instead:
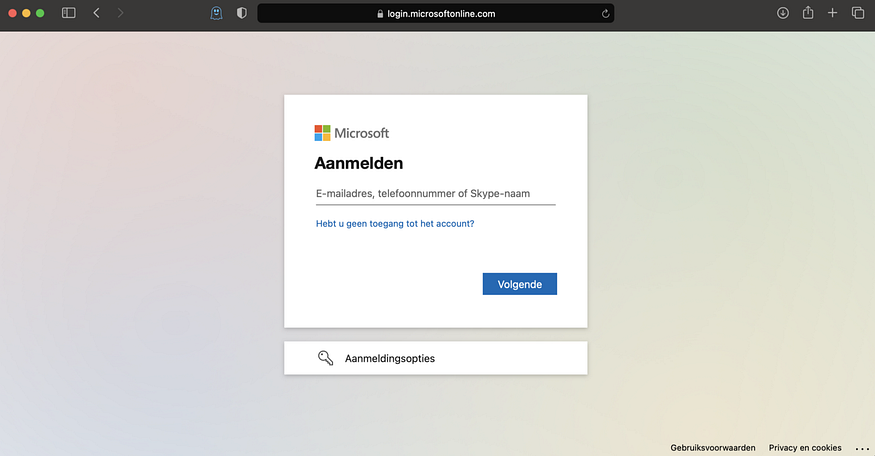
Since an API is most often called from another application, and not a browser, it’s not really relevant to have a nice looking login screen. Returning a 401 on unauthorized requests is enough. But, if a nice looking login screen is what you’re looking for, you can go with the 302 option and even add your own branding to it- a nice touch!

So, our API now requires authentication! That’s great, but how do authenticate ourselves?

There are two kinds of authentication: user authentication and service authentication. With user authentication the requesting entity is a user represented as Active Directory user. With service authentication the requesting entity is a service represented as a specific Azure resource (another App Service for example).

Let’s explore both options in the following sections. You can follow either the user authentication or service authentication part. Both sections are independent from each other.

1️⃣ User authentication: Azure Active Directory

If you want to authenticate users, you can do that with Azure Active Directory (Azure AD). This kind of authentication is more common for front-end applications, but you can also use it in back-end solutions.

Azure AD is a cloud-based identity and access management (IAM) solution. It helps members of an organization to log in to resources in the Azure Portal, apps on a corporate network or intranet, and services like Microsoft 365.

When we set-up Microsoft as identity provider, an enterprise application was created for us. Here we can manage user access. By default, all users in our organization have access to our API. But we can think of scenarios where we only want to allow certain teams or individuals to have access to the API. So let’s start by allowing only a single user to the API.

Find your enterprise applications by searching for it in the Portal:

Your application has the same name as the App Service you set up. In our case that is ‘plumberdemo’:

Click on it, and go to ‘Properties’. You need to set make assignment required:

If you’ve done that, you can go to ‘Users and groups’ to add your desired users.

And no, I did not change name. In my case we’re adding my business partner Greg to our API 😉.

Once you’ve set this up other users in Azure AD won’t have access to your API anymore. Now let’s see how this works out in Postman!

First, we need to create a Client Secret. A Client Secret is a secret string that the API uses to prove its identity when requesting a token. It’s also referred to as the application password. We set a Client Secret in our App registrations. You can easily find your the registration for your API there:

Click on it, and navigate to the ‘Certificates & secrets’ section. You can create a new client secret there. Just give it a name (‘ClientSecretDemo’ in my case) and choose an expiry date for you secret. It defaults to 6 months.

Save the value for later. We’re going to use that for our request in Postman.

The second thing we need to do is change something in our Manifest. Instead of setting accessTokenAcceptedVersion to null (which means 1 by default), we are going to set it to 2:

If you don’t do this step, you will get IDX10205: Issuer validation failed when making the request in Postman at a later stage.

Azure is ready, now it’s time for Postman. In Postman we go to ‘Authorization’ and we choose ‘OAuth 2.0’ from the list of possibilities:

We’re going to configure a new token:

As you can see we need a lot of information. To fill everything in we need a Resource IDClient ID, and Directory ID. You can find all of them on the App registration Overview page:

From the page itself it’s quite self-evident where we need to put the Client ID, but for the other two (Resource ID and Diterctory ID) it’s a bit more work.

The Auth URL and Access Token URL both use the Resource ID and Directory ID, like so:

If we fill everything in it looks like this:

After filling in all the required information we can get the new access token. We get asked to sign in and we need to sign in with the account that we granted access earlier.

If all goes well, we get our Access Token of type Bearer returned in Postman:
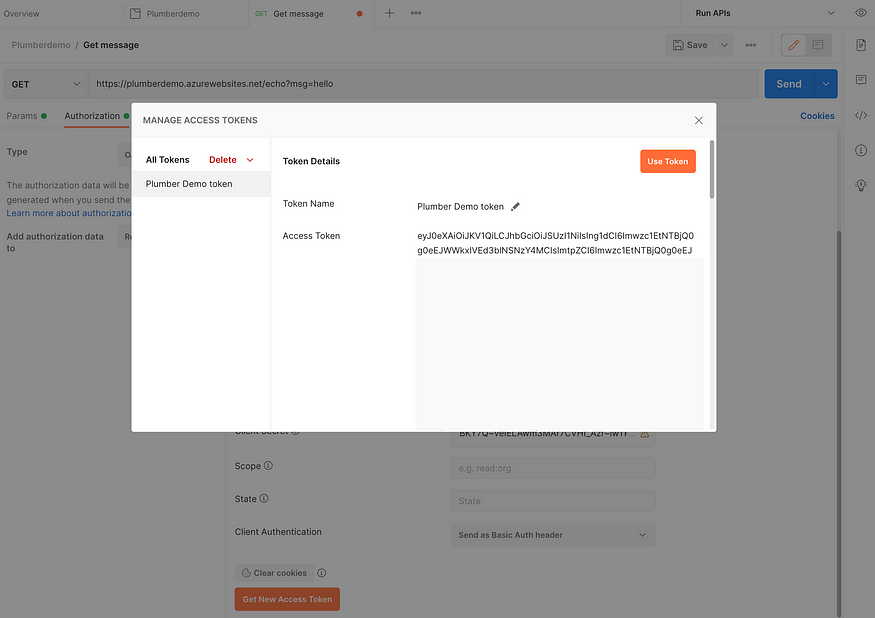
Click ‘Use Token’. If we’re trying to make a request now, we don’t get 401 anymore, but 200!

2️⃣ Service authentication: API Management

There’s also another option. Instead of user based authentication we can add service based authentication. We’re not authenticating an user, but we’re authenticating another application.

To follow along with this part of the tutorial, remove the Azure identity configuration in your App Service if you did that in the previous section!

API keys are simple to add using Azure API Management. Let’s first create an API Management resource:
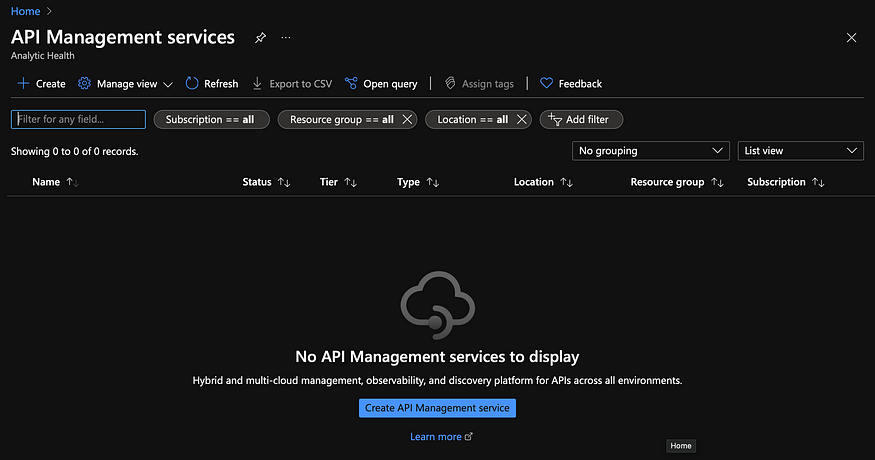
Create the resource and after deployment you can go ahead with the next steps. Deployment can take a while.

When you create an API Management resource, you are creating a “shell” that needs to be filled with your APIs. Those APIs can come from anywhere, Azure App Service included.

Let’s create an API for our ‘plumberdemo’ by importing our API from App Service:

If you look into the settings of your newly added API you’ll see a ‘General’ and a ‘Subscription’ section. It’s important that ‘Subscription required’ is turned on and that you set an API URL suffix, like this:
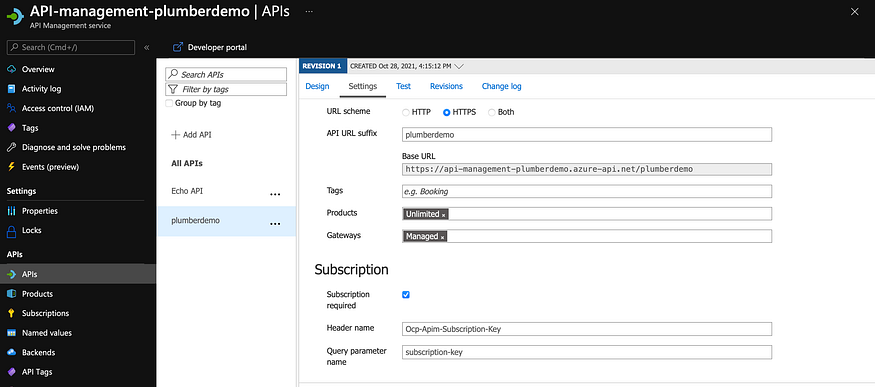
The next step is to adjust the backend URL (in the ‘Design’ panel) and override the URL. You need to set it to your original App Service URL:

Now go to ‘Subscriptions’ on the left and add a new subscription. You can also use one of the automatically added subscriptions. But for the sake of the tutorial we create a new one:

After creating it you can show the keys by clicking ‘…’:

You can use the primary key when we’re trying to make a request. But let’s first see what happens if we don’t use our key. If we want to make a request with Postman without specifying a key, we get a nicely formatted message saying we’re not allowed to do so:

But if we supply our key in the header (the name of which you can choose at the settings in your API):

We get our desired response!

One questions remains: how do we make sure that people don’t make a request directly to the URL of the App Service itself (plumberdemo.azurewebsites.net)? After all, it’s not there that we concern ourselves with authentication if we take this route. Luckily our API Management service has an IP. And while I mentioned here that it was not the recommended way to do things, we can do so in this particular case because the IP is fixed and it’s the only service making use of the API.

We can simply go to our App Service and add ‘Access Restrictions’, so we allow only the IP our API Management service:

This will get us a 401 when going to the URL of the App Service directly…
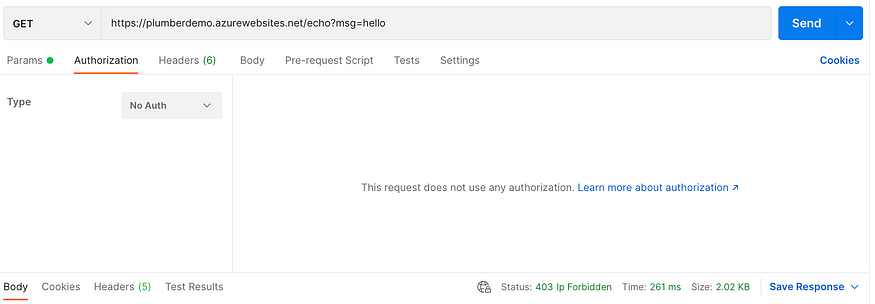
But it will still allow us to make calls to our API Management service with our subscription key:

Summary

In this article I explained the difference between authentication and authorization and I showed you different options for adding authentication to your Azure App Service. We can add user based and service based authentication. The first uses Azure Active Directory and the second uses Azure API Management.

By following the first part on how to host an R Plumber API on Azure App Service and this part on how to add authentication to your API, you master the basics to build your own API and use it in other applications to share your work with (part of) the world 🚀.

Happy programming!

Resources

Protect an API in Azure API Management using OAuth 2.0 authorization with Azure Active Directory

In this article, you'll learn high level steps to configure your Azure API Management instance to protect an API, by using the OAuth 2.0 protocol with Azure Active Directory (Azure AD).

For a conceptual overview of API authorization, see Authentication and authorization to APIs in API Management.

Prerequisites

Prior to following the steps in this article, you must have:

  • An API Management instance
  • A published API using the API Management instance
  • An Azure AD tenant

Overview

Follow these steps to protect an API in API Management, using OAuth 2.0 authorization with Azure AD.

  1. Register an application (called backend-app in this article) in Azure AD to protect access to the API.

    To access the API, users or applications will acquire and present a valid OAuth token granting access to this app with each API request.

  2. Configure the validate-jwt policy in API Management to validate the OAuth token presented in each incoming API request. Valid requests can be passed to the API.

Details about OAuth authorization flows and how to generate the required OAuth tokens are beyond the scope of this article. Typically, a separate client app is used to acquire tokens from Azure AD that authorize access to the API. For links to more information, see the Next steps.

Register an application in Azure AD to represent the API

Using the Azure portal, protect an API with Azure AD by first registering an application that represents the API.

For details about app registration, see Quickstart: Configure an application to expose a web API.

  1. In the Azure portal, search for and select App registrations.

  2. Select New registration.

  3. When the Register an application page appears, enter your application's registration information:

    • In the Name section, enter a meaningful application name that will be displayed to users of the app, such as backend-app.
    • In the Supported account types section, select an option that suits your scenario.
  4. Leave the Redirect URI section empty.

  5. Select Register to create the application.

  6. On the app Overview page, find the Application (client) ID value and record it for later.

  7. Under the Manage section of the side menu, select Expose an API and set the Application ID URI with the default value. If you're developing a separate client app to obtain OAuth 2.0 tokens for access to the backend-app, record this value for later.

  8. Select the Add a scope button to display the Add a scope page:

    1. Enter a new Scope nameAdmin consent display name, and Admin consent description.
    2. Make sure the Enabled scope state is selected.
  9. Select the Add scope button to create the scope.

  10. Repeat the previous two steps to add all scopes supported by your API.

  11. Once the scopes are created, make a note of them for use later.

Configure a JWT validation policy to pre-authorize requests

The following example policy, when added to the <inbound> policy section, checks the value of the audience claim in an access token obtained from Azure AD that is presented in the Authorization header. It returns an error message if the token is not valid. Configure this policy at a policy scope that's appropriate for your scenario.

  • In the openid-config URL, the aad-tenant is the tenant ID in Azure AD. Find this value in the Azure portal, for example, on the Overview page of your Azure AD resource. The example shown assumes a single-tenant Azure AD app and a v2 configuration endpoint.
  • The value of the claim is the client ID of the backend-app you registered in Azure AD.
XML
<validate-jwt header-name="Authorization" failed-validation-httpcode="401" failed-validation-error-message="Unauthorized. Access token is missing or invalid.">
    <openid-config url="https://login.microsoftonline.com/{aad-tenant}/v2.0/.well-known/openid-configuration" />
    <audiences>
        <audience>{audience-value - (ex:api://guid)}</audience>
    </audiences>
    <issuers>
        <issuer>{issuer-value - (ex: https://sts.windows.net/{tenant id}/)}</issuer>
    </issuers>
    <required-claims>
        <claim name="aud">
            <value>{backend-app-client-id}</value>
        </claim>
    </required-claims>
</validate-jwt>

 Note

The preceding openid-config URL corresponds to the v2 endpoint. For the v1 openid-config endpoint, use https://login.microsoftonline.com/{aad-tenant}/.well-known/openid-configuration.

For information on how to configure policies, see Set or edit policies. Refer to the validate-jwt reference for more customization on JWT validations. To validate a JWT that was provided by the Azure Active Directory service, API Management also provides the validate-azure-ad-token policy.

Authorization workflow

  1. A user or application acquires a token from Azure AD with permissions that grant access to the backend-app.

  2. The token is added in the Authorization header of API requests to API Management.

  3. API Management validates the token by using the validate-jwt policy.

    • If a request doesn't have a valid token, API Management blocks it.

    • If a request is accompanied by a valid token, the gateway can forward the request to the API.

Securing APIs: 10 Best Practices for Keeping Your Data and Infrastructure Safe

Interesting points:

overview and some quick summary of differnt security protection methodologies used. Not given complete details of how to implement but quite simpel way to understand api security. 

Introduction

In part one of this two-part series, we explained what web APIs are and how they work. In this article, we look at how APIs can pose risks to your data and infrastructure—and what you can do to secure them.

In part one, we learned that web APIs (application programming interfaces) provide a way for app developers to “call” information from outside sources into the applications they build. The example we gave was a travel app, which uses web API calls to pull in availability and pricing information from various hotel, airline, cruise line, tour, car rental, and other companies. APIs benefits app developers by simplifying the coding process and granting them access to a wealth of data and resources they would not otherwise be able to access. APIs also benefit providers, who are able to create new revenue streams by making valuable data and services available to developers, usually for a fee. And ultimately, APIs benefit consumers, who appreciate (and drive demand for) innovative, feature-rich, interactive apps that provide many services all in one app.

Understanding the Potential Risks of APIs

The downside of publicly available web APIs is that they can potentially pose great risk to API providers. By design, APIs give outsiders access to your data: behind every API, there is an endpoint—the server (and its supporting databases) that responds to API requests (see Figure 1). In terms of potential vulnerabilityA vulnerability is an inherent weakness in a system (hardware or software) that an attacker can potentially exploit. Vulnerabilities exist in every system; “zero-day” vulnerabilities are those that have not yet been discovered., an API endpoint is similar to any Internet-facing web server; the more free and open access the public has to a resource, the greater the potential threat from malicious actors. The difference is that many websites at least employ some type of access control, requiring authorized users to log in. One problem with some APIs, as we’ll see shortly, is that they provide weak access control and, in some cases, none at all. With APIs becoming foundational to modern app development, the attack surfaceAttack surface refers to all entry points through which an attacker could potentially gain unauthorized access to a network or system to extract or enter data or to carry out other malicious activities. is continually increasing. Gartner estimates that “by 2022, API abuses will move from infrequent to the most frequent attack vectorThe path available and means by which an attacker can gain unauthorized access to a network, system, program, application, or device for malicious purposes., resulting in data breaches for enterprise web applications.”1

Web APIs connect to an endpoint: the web server and supporting databases
Figure 1: Web APIs connect to an endpoint: the location of the web server and supporting databases

In worst case, it’s not just your data that is potentially at risk but also your infrastructure. By exploiting a vulnerable API, attackers can gain access to your network using one kind of attack. If they’re able to escalate privileges, they can then pivot to other types of attacks and gain a foothold in the network. The right attack—often a multi-level attack—could potentially lead to your organization’s most sensitive data being compromised, whether it’s personally identifiable information (PII) or intellectual property (IP).

No matter what the attack vector, a data breach is a data breach: it can damage your company’s brand and reputation and could result in significant fines and lost revenue. No organization is immune; some of the largest and well-known companies—Facebook,2, 3 Google,4 Equifax,5 Instagram,6, 7 T-Mobile,8 Panera Bread,9 Uber,10 Verizon,11 and others—have suffered significant data breaches as a result of API attacks. It’s imperative for all companies, not just large ones, to secure all APIs, particularly those that are publicly available.

Common Attacks Against Web APIs

APIs are susceptible to many of the same kinds of attacks defenders have been fighting in their networks and web-based apps for years. None of the following attacks are new but can easily be used against APIs.

  • Injection occurs when an attacker is able to insert malicious code or commands into a program, usually where ordinary user input (such as a username or password) is expected. SQL injection is a specific type of injection attack, enabling an attacker to gain control of an SQL database.
  • Cross-site scripting (XSS) is a type of injection attack that occurs when a vulnerability enables an attacker to insert a malicious script (often JavaScript) into the code of a web app or webpage.
  • Distributed denial-of-service (DDoS) attacks make a network, system, or website unavailable to intended users, typically by flooding it with more traffic than it can handle. API endpoints are among the growing list of DDoS targets.
  • Man-in-the-middle (MitM) attacks occur when an attacker intercepts traffic between two communicating systems and impersonates each to the other, acting as an invisible proxy between the two. With APIs, MitM attacks can occur between the client (app) and the API, or between the API and its endpoint.
  • Credential stuffing is the use stolen credentials on API authentication endpoints to gain unauthorized access.

Briefly, Table 1 matches attack types to traditional mitigations:
 

API Attack Types and Mitigations
Attack TypeMitigations
InjectionValidate and sanitize all data in API requests; limit response data to avoid unintentionally leaking sensitive data
Cross-Site Scripting (XSS)Validate input; use character escaping and filtering
Distributed Denial-of-Service (DDoS)Use rate limiting and limit payload size
Man-in-the-Middle (MitM)Encrypt traffic in transit
Credential StuffingUse an intelligence feed to identify credential stuffing and implement rate limits to control brute force attacks

Table 1. Common attack types that can be used against APIs matched to corresponding mitigations

Best Practices for Securing APIs

In addition to employing the mitigations outlined in Table 1, it’s critical that organizations adhere to some basic security best practices and employ well-established security controls if they intend to share their APIs publicly.

  • Prioritize security. API security shouldn’t be an afterthought or considered “someone else’s problem.” Organizations have a lot to lose with unsecured APIs, so make security a priority and build it into your APIs as they’re being developed.
  • Inventory and manage your APIs. Whether an organization has a dozen or hundreds of publicly available APIs, it must first be aware of them in order to secure and manage them. Surprisingly, many are not. Conduct perimeter scans to discover and inventory your APIs, and then work with DevOps teams to manage them.
  • Use a strong authentication and authorization solution. Poor or non-existent authentication and authorization are major issues with many publicly available APIs. Broken authentication occurs when APIs do not enforce authentication (as is often the case with private APIs, which are meant for internal use only) or when an authentication factor (something the client knows, has, or is) can be broken into easily. Since APIs provide an entry point to an organization’s databases, it’s critical that the organization strictly controls access to them. When feasible, use solutions based on solid, proven authentication and authorization mechanisms such as OAuth2.0 and OpenID Connect.
  • Practice the principle of least privilege. This foundational security principle holds that subjects (users, processes, programs, systems, devices) be granted only the minimum necessary access to complete a stated function. It should be applied equally to APIs.
  • Encrypt traffic using TLS. Some organizations may choose not to encrypt API payload data that is considered non-sensitive (for example, weather service data), but for organizations whose APIs routinely exchange sensitive data (such as login credentials, credit card, social security, banking information, health information), TLS encryption should be considered essential.
  • Remove information that’s not meant to be shared. Because APIs are essentially a developer’s tool, they often contain keys, passwords, and other information that should be removed before they’re made publicly available. But sometimes this step is overlooked. Organizations should incorporate scanning tools into their DevSecOps processes to limit accidental exposure of secret information.
  • Don’t expose more data than necessary. Some APIs reveal far too much information, whether it’s the volume of extraneous data that’s returned through the API or information that reveals too much about the API endpoint. This typically occurs when an API leaves the task of filtering data to the user interface instead of the endpoint. Ensure that APIs only return as much information as is necessary to fulfill their function. In addition, enforce data access controls at the API level, monitor data, and obfuscate if the response contains confidential data.
  • Validate input. Never pass input from an API through to the endpoint without validating it first.
  • Use rate limiting. Setting a threshold above which subsequent requests will be rejected (for example, 10,000 requests per day per account) can prevent denial-of-service attacks.
  • Use a web application firewall. Ensure that it is able to understand API payloads.

Conclusion

APIs have arguably become the preferred method for building modern applications, especially for mobile and Internet of Things (IoT) devices. And while the concept of pulling information into a program from an outside source is not a new one, constantly evolving app development methods and the pressure to innovate means some organizations may not yet have grasped the potential risks involved in making their APIs publicly available. The good news is that there’s no great mystery involved in securing them. Most organizations already have measures in place to combat well-known attacks like cross-site scripting, injection, distributed denial-of-service, and others that can target APIs. And many of the best practices mentioned above are likely quite familiar to seasoned security professionals. If you’re not sure where to begin, start at the top of the list and work your way down. No matter how many APIs your organization chooses to share publicly, your ultimate goal should be to establish solid API security policies and manage them proactively over time.

Your First Microservice in .NET 6

Very simple way to start writing microservices... It is just writing one service and don't cover communication of microservices  or  dep...